DIY papier mache material. Fun DIY papier-mâché crafts. Manufacturing of products according to mold models
DIY papier-mâché for beginners: instructions and recommendations
Making crafts from papier-mâché is not at all difficult. Papier-mâché is an original technique that is now widely used in schools and gardens as a method of handicraft. The name comes from French and translates as “crumpled paper.” Learning how to create crafts is not at all difficult, since papier-mâché is not a complicated technique. In addition, this method is interesting to many because it does not require spending a lot of money on materials. After all, to make a beautiful piece of furniture, a toy will only need an old newspaper, or toilet paper, glue, paints and imagination. It is enough to watch the master class once to be convinced of this.
Papier-mâché technique for beginners
Initially, the papier-mâché technique was used when making dolls with their own hands.
Now this method is widely used for making:
- Teaching aids;
- dummies;
- Masks;
- Toys;
- Theater props;
- Casket.
Professional craftsmen even make furniture accessories and lighting fixtures from papier-mâché.
Initially, the papier-mâché technique was used to make dolls
For beginners creating crafts, there is one simple rule - show maximum imagination and be patient.
Products are created in three ways. First, the paper is soaked in water, thawed for 1 hour, and wrung out. Any glue can be added to it - PVA, wood glue, paste. All ingredients are mixed until smooth. It should have the consistency of sour cream. In some cases, a mixer is used for mixing. From this composition you can sculpt crafts, create three-dimensional products, you can see which ones by watching a master class.
The second method is to glue small pieces of newsprint in several layers to a specific base.
You can create crafts of any complexity from papier-mâché
After creating the craft, decoration is done with paints, beads, seed beads, colored paper, and varnish.
As a basis for products, you can use anything that comes to hand - balloons, balls, vases, bottles, plates, wire frames.
Papier-mâché: animals
A master class on creating animal figures is offered by many papier-mâché professionals. But, it is not necessary to have an art education. After all, you can conduct a master class at home with your child. Making animals with your own hands using the papier-mâché technique is not at all difficult.
Funny papier-mâché bunnies
Giraffe: master class
The frame of a future craft in the form of a giraffe is made from rigid wire. Soak toilet paper in warm water. Some even use paper egg boxes. After mixing the paper with glue, you can start creating a masterpiece with your own hands. An adhesive mixture is applied to the frame and the body of the animal is formed. The technique is similar to modeling with plasticine.
After one part is applied to the wire, you need to let the layer harden. Then apply another layer, forming the tail, ears and face of the giraffe. Let dry. Each layer must be dry, otherwise nothing will work. When the body is ready, you can move on to decorating. Using gouache, paint the body yellow and make spots with brown. Eyes and mouth - with black marker. After the paint has dried, coat with varnish.
You can make a cute giraffe out of papier-mâché
DIY sheep
To create a sheep you will need plastic frames from chocolate eggs, cotton wool, paper, paints, and PVA glue. The surface of the frame should be treated with vegetable oil before starting work. This will help you later remove the plastic base without any obstacles. The adhesive composition prepared in advance is applied to the frame halves in a layer of about 3-4 mm. After hardening, the base is removed and the halves are glued together. Accordingly, you need to prepare two blanks: for the body and head.
The legs are made either from paper, by twisting it into a tube, or from wire, which must then be attached to the body and adhesive material applied to each of them. After drying, coat the figure with PVA glue and apply cotton balls on it. The more balls, the larger the sheep will be. The eyes are cut out of paper, the ears are formed from cotton wool and glued. You can clearly see the process by watching the master class.
And also an equally cute little sheep!
Plate made using papier-mâché technique
Using papier-mâché, you can make original interior items with your own hands. The master class shows that professionals create plates, paintings, and exquisite kitchen lamps. Making a plate with your own hands is as easy as shelling pears.
For this you will need:
- Shallow dish;
- Newspapers;
- PVA glue;
- Cling film or tape;
- Paints;
- White acrylic paint;
- Brushes.
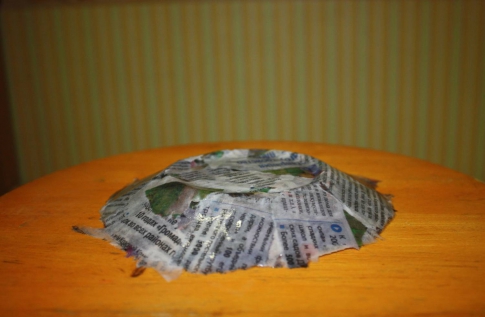
The newspaper should be torn into small pieces and moistened with water. The plate is wrapped in cling film. The first layer of newspaper pieces is applied to the plate base without glue. Subsequent layers must be coated with PVA or paste. The more layers, the stronger and more durable the craft will be.
You need to know that after every 5-6 layers you need to let the paper dry, removing air bubbles.
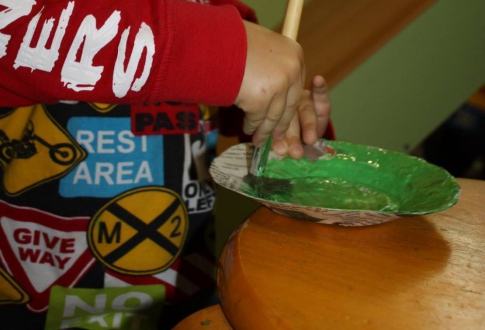
The surface of the plate is covered with acrylic paint. In the future, it can be decorated with any color - brown, red, green. Some take napkins with various images as a basis for the design and glue them to the plate after covering them with acrylic. When the base color is applied, the edges of the napkin will not be visible.
Papier-mâché: box
A master class from the best masters proves that even a child can make beautiful crafts with his own hands.
To make a box you need to prepare:
- Cardboard cylinders from adhesive tape;
- Scotch tape (can be replaced with masking tape);
- Glue;
- Sheets of thick and thin cardboard;
- Newspaper;
- Scissors, pencil;
- Primer material;
- Lace or braid;
- Beads, seed beads, artificial stones;
- Gouache, brush;
- Transparent nail polish.
The basis of the box will be cylinders from adhesive tape, respectively used. They can be replaced with cardboard, thick cylinders from photographic paper. Some people use regular cardboard, coated with glue and dried.
Depending on the size, you will need 1, 2 or 3 blanks. The more there are, the higher the box will be. The bases must be glued together with glue or masking tape.
An obligatory step is making the bottom for the box. To do this, place the base on a cardboard sheet and draw a circle from the inside with a pencil, which is then cut out and glued to the base with glue. The lid is made in the same way, only the circle is drawn from the outside + 2-3 mm. The box must have a side. You can make it from cardboard. To do this, a strip 15 mm wide is cut. Using glue, the side is glued to the base.
Wonderful box made using papier-mâché technique
Having kneaded the newspapers well, you should tear them into small pieces. Now you can start gluing the base of the box. It is necessary to apply newspaper sections in such a way that a base without gaps is obtained. Number of layers – 8-9. After every 3 layers you need to let the craft dry. Uneven edges are trimmed with scissors.
The box does not have to have smooth contours. With the help of an adhesive composition, it is possible to add flowers, make the box into a house, decorating it with a window, bricks and a door, as your imagination dictates.
Toilet paper is soaked in water and wrung out. PVA glue is also added here. It is better to mix the composition with a mixer until it reaches the consistency of sour cream. From this mixture you can mold, like plasticine, any decorative element for a box.
The master class shows that specialists make patterns, ornaments, and drawings. Natural elements look very beautiful in the design - spruce branches, shells, coffee beans and much more. On the lid of the box you can make a beautiful large flower or pattern from the adhesive mixture. After all the elements have hardened, the surface of the box is covered with a primer material. If there are roughness or unevenness on the surface or patterns, all defects can be easily removed using sandpaper or a thin file. After priming, white acrylic paint is applied to the entire surface of the box. As soon as it dries, you can pick up paints and paint the craft. If you plan to decorate with beads, braid, or velvet, all these elements are glued to the box with glue. The final stage is to treat the surface with a transparent nail coating. This is done in order to secure the elements of the box and the paint.
Papier-mâché allows you to make your own crafts that will not only become excellent decorative elements for different rooms, but also wonderful, memorable gifts.
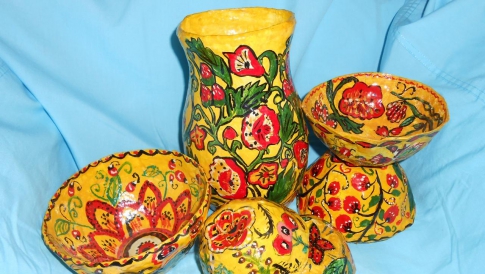
Papier-mâché: vegetables and fruits
After watching a master class on making crafts using the papier-mâché technique once, you can be convinced that the procedure, although lengthy, is not at all complicated.
Papier-mâché fruit
An excellent decorative element for the kitchen is a papier-mâché plate with artificial fruits, which are also made using this technique. If desired, you can create not only fruits, but also vegetables.
Any real fruit or vegetable is covered with cling film and an adhesive composition (toilet paper, glue) is applied to the surface. After drying, the layer is cut into two parts, the base is removed, and the halves of the craft are glued together with glue. Then the fruit or vegetable is primed and painted with gouache in the appropriate color. Afterwards the surface is covered with a fixative – transparent nail varnish.
DIY papier-mâché for beginners (video)
Thus, you can create artificial vegetables and fruits, animal figures and other decor that are as close in shape and appearance as possible to natural ones.
Did you know that the interesting art of papier-mâché did not originate in France, as the name might suggest, but in China? It was the inhabitants of the Far East who came up with the idea that paper was an excellent material for modeling. Try and get involved in the art of papier-mâché using the materials you have at home.
Methods of application
There are several different papier-mâché techniques - working with a pre-prepared mass and pasting with pieces of paper of a certain shape. The method of work must be chosen depending on what kind of product you want to make.
Working with mass
A sticky plastic material made from paper soaked in paste is excellent for creating large voluminous objects using the papier-mâché technique. For example, in ancient times, Chinese guards were dressed in light paper armor.
Modern craftsmen use this technique to create toys, decorative elements for home decoration, and even furniture! The work process is reminiscent of sculpting.
Pasting with pieces of paper
Maching is what this papier-mâché technique is called. Initially, the master selects the shape that he would like to repeat in his product. After this, you need to prepare a lot of paper pieces - you can simply tear newspaper sheets into small pieces. The base is covered with several layers of paper, after which the product is removed from it and painted.
Using machining it is easy to create dishes: vases, dishes, plates. In addition, in this way you can make small three-dimensional figures that are hollow inside - rattles or maracas, for example.
Paper dough: recipe
A lot of papier-mâché is easy to prepare at home, because you probably already have all the necessary ingredients on hand! In the process, you will need thin paper like newsprint, starch, and water.
- Pour water slightly warmer than room temperature over the starch to create a sticky substance with the consistency of pancake batter.
- Tear the paper into small pieces and place in a dish with high walls.

- Gradually add small portions of starch paste and knead the paper mass until you get a homogeneous paper dough.
The dough should be slightly sticky, viscous, similar to plasticine. The finished mixture can be used immediately. If you end up with too much working material, cover the dish with it in cling film and put it in the refrigerator - then the paper pulp can be used at any time.
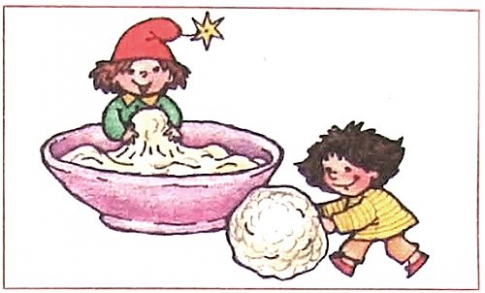
You can use the recipe for this test to complete the next video tutorial - creating a stucco vase decorated with a fairy bird from papier-mâché.
This papier-mâché technique is so easy to perform that it can be used in craft classes or in orphanages for creativity. Children will enjoy modeling from a new original material, different from salt dough and plasticine.
Recently, craftsmen have been gradually moving away from the papier-mâché dough recipe described above. Now they use materials that did not exist before: instead of starch paste - 500 grams of liquid PVA glue, instead of old newspapers - paper towels and toilet paper.
In addition, papier-mâché masters found a way to make the material more flexible - for this they added 3 tablespoons of linseed oil to the recipe.
- Shred 2 rolls of toilet paper as much as possible, place in a deep bowl and fill with about 1.5 liters of water. Press the paper so that it is all in the water and leave it to swell for a day at room temperature.
- The next day, squeeze out the mass, but so that some moisture remains inside. Add glue in small portions and mix thoroughly to form a homogeneous consistency.
- Finally, add the oil and mix again.
This mass can also be set aside and used later. But do not forget that before storing in the refrigerator, the dish with the material must be wrapped in cling film so that the moisture does not evaporate.
Papier-mâché plate
This technique for creating paper crafts is a little simpler and takes less time than the previous one. It does not require pre-kneading the dough. Just tear up a lot of strips and pieces of newsprint, prepare a plate mold, a bowl of water at room temperature and PVA or wallpaper glue.
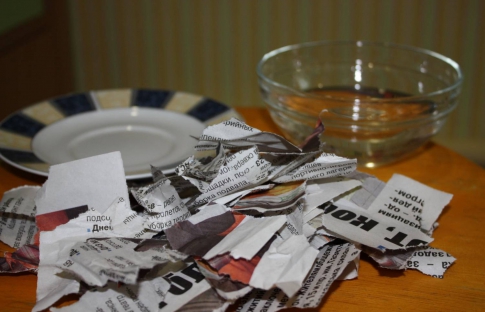
- Turn the plate upside down. Lubricate the workpiece with vegetable oil or Vaseline - this will prevent your papier-mâché product from sticking.
- Soak the paper in water and apply it to the workpiece. Lay out the entire first layer of work in the same way.
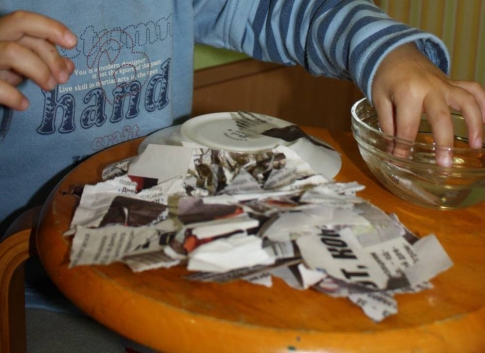
- Dip the first piece of paper of the next layer in glue and glue it to the work. Repeat with all the parts of the second layer, then generously coat them with PVA glue on top using a brush.

- Do subsequent layers in the same way as the previous one. Depending on how thick the product you want, increase or decrease the number of paper levels.
- When you achieve the desired thickness of the workpiece, leave it to dry in a dry room at room temperature. Wait approximately 1-2 days.
- After the workpiece is completely dry, remove it from the plate - this will be easy to do thanks to the fatty layer of oil.
- Sand the jagged edges and surface with sandpaper and apply a coat of putty. This will make the product smoother.
- Color your plate as you see fit.
The craft can be decorated with molded patterns made from paper dough - in this case, you will combine both papier-mâché techniques in one product.
 Use thick paints, such as oil paints or gouache, to create vibrant colors in your designs. After the paint has dried, be sure to varnish the product to protect it from peeling and the paper absorbing moisture from the air.
Evgenia Smirnova
To send light into the depths of the human heart - this is the purpose of the artist
18 Mar 2014
Content
Compared to other types of handicraft, papier-mâché stands out for its versatility and originality. Now you will learn what the rules are for making papier-mâché and how to make simple but very beautiful things from it.

To make a souvenir, gift or just a useful thing, you don’t have to be a master of pottery. You can stock up on plenty of scrap paper and start creating. We will now look in more detail at how to make papier-mâché from what is at hand. Thanks to these recommendations, you will easily learn all the intricacies of this matter, understanding the main difficulties and nuances.
History of papier-mâché
Papier-mâché is a homogeneous mass created from paper waste with the addition of any adhesive. Translated from French, this name translates as “chewed paper.” This composition was first used in the 16th century in France. Even then, paper dolls became incredibly popular. In Russia, papier-mâché appeared only under Peter I, and its industrial use began at the beginning of the 19th century.
A huge number of products are made from papier-mâché. Thanks to their composition, they are particularly light but durable. If initially the mass was used only for creating dolls, then later it began to be used for making dishes, souvenirs, masks, toys, and decorative elements. But papier-mâché is especially indispensable in theatrical art, where dummies and theatrical props are made from it.
Methods for creating paper pulp
Today there are only three ways to create a mass of papier-mâché:
- The simplest is layer-by-layer technology. Small pieces of paper are placed on a pre-prepared mold made of clay, plaster or other material. In some cases, the number of superimposed layers can reach up to a hundred. As a rule, for this purpose several strips are cut and placed on top of each other in different directions.
- It is especially important that the strip is coated with glue on both sides, which will subsequently ensure the strength of the finished product. As soon as the first layers of 3-4 pieces are created, it is necessary to thoroughly dry the product. Only after this they continue to work, drying every 4 layers. Further work directly depends on the purpose of the craft.
- A more ancient method is the production of papier-mâché from paper pulp. To do this, tear newspaper or other paper into small pieces and soak in hot water for 8-10 hours. Next, heat the mixture to break down the fibers. Using a colander, drain the water and grind the paper into a homogeneous mass (with a mixer or blender). Add paste or glue to it, depending on the chosen method. The result is a homogeneous mass, which is as easy to work with as with plasticine.
- The third method is more complex and is often used in industrial settings. Sheets of cardboard are placed on top of each other and coated with adhesive, after which they are pressed. As soon as the workpiece dries, it is sanded and painted. This technique produces flat elements that require special strength.
How to prepare material for working with papier-mâché
Any instructions regarding the creation of papier-mâché begin with the preparation of the necessary supplies. First of all, it is paper. For the first time, use newspaper. It gets wet easily, and the finished product will be especially durable. It’s just as easy to work with regular toilet paper or napkins. In addition to the above, egg cartons, cardboard, including corrugated cardboard, and other similar paper products are suitable.
Ready-made glue is used as an adhesive composition. As a rule, it is PVA diluted with water in a 1:1 ratio. At home, starch or flour can be used to prepare the paste. The density of the composition depends on work experience and the type of product being manufactured.
In addition, you will need a base or mold for modeling, vegetable oil with which to lubricate its surface to prevent the mass from sticking to the mold, acrylic paint and varnish. If you don’t have special paint, you can mix gouache and PVA glue in equal parts. This composition is easily washed off from the product when it has not yet completely dried, and after complete drying it does not smear even when applying subsequent layers or varnish.
Before you work on paper, you need to prepare a paste. To do this, boil a small amount of water. In a separate bowl, mix 2-3 tablespoons of flour or starch with water until smooth. Pour this mixture into boiling water in a thin stream and heat until thickened. The more starch or flour you add, the thicker your paste will be. It is much easier to prepare glue. To do this, pour the required amount of glue into a separate container and add the same amount of water, stirring thoroughly.

The selected material (newspaper or paper) must be crushed. This work is painstaking, but the further process will depend on how finely you tear the paper. The pieces need to be poured with hot water and allowed to stand for several hours. After this, drain the water and use a mixer to grind the paper into a homogeneous mass. If the mixture is too liquid, simply drain it in a colander and squeeze out the excess water. A similar technique can be used no matter what material you use.
The resulting dust must be mixed with glue to form plasticine and allowed to rest. If you do not plan to sculpt immediately after preparation, you can store the mixture in a tight bag in a cool place. For those who do not fully understand the features of preparing the mass, we recommend watching the video lesson.
To make the product especially durable, do not be lazy to make more layers. This is especially true for masks and plates. While working, you need to wear gloves to avoid contamination of your hands, otherwise the glue and paste will dry on the skin and the product will begin to stick to your hands.
Experiment with the materials you use. Gradually you will find what you are more comfortable working with. Be sure to cover the base with oil, otherwise after drying you simply will not be able to remove the workpiece from it. It is especially important not to cut the paper, but to tear it. This is the only way you can break the bond of the fibers, and the mass will be more homogeneous.
Important advice for painting papier-mâché items. If you plan to create a white product, then you need to use white paper, and only for the last two layers. In other cases, you can simply paint the product in the desired color. But the varnish coating will protect the craft from moisture.
Be sure to cover the work surface, otherwise the glue will be difficult to clean off later. Do not rush to apply the next layers without waiting for the previous ones to dry. You also need to paint only after all layers have dried thoroughly.
Step-by-step instructions for making a papier-mâché plate

- Prepare a plate - it will be our base. It needs to be lubricated with vegetable oil or Vaseline.
- If you use ready-made mass, then simply apply it to the plate in the required layer, carefully pressing it to the surface.
- When using strips, simply stick them in a chaotic order on a plate.
- We smooth the surface with fingers dipped in glue, creating a perfectly smooth surface.
- Let the workpiece dry for 2-3 days (depending on thickness).
- Carefully remove the plate from the mold and dry it in this form for another day.
- Next, we use paints or, as an example, a mixture of gouache and PVA glue. You can also decorate the product with decoupage napkins, craquelure varnish, or use other techniques for decoration.
- A day after applying the last layer, you need to coat the product with varnish on both sides and dry it.
- A hole is made with a thin drill (if it was originally planned to hang the plate on the wall).
Step-by-step making of a carnival mask from papier-mâché

- Let's prepare the form. This can be a ready-made plastic mask. You can also mold it from plasticine. It is especially easy to make masks using jars. To do this, a contour is drawn on the can, and a convexity of the nose and forehead is created from plasticine.
- After the surface is lubricated, apply the mixture and dry all layers.
- This work continues until the mask becomes durable. Be sure to follow the instructions for working with layered papier-mâché, otherwise if there is not enough glue between the pieces of paper, the finished product will simply crumble.
- Then the previous scheme is repeated: the mask is covered with paints, decorated with feathers, beads and other elements, and also varnished.
Making papier-mâché beads

- You can make beads of absolutely any shape. We need to determine what our product will look like. After this, prepare thin wire, pliers and scissors. In this case, all steps must be performed as carefully as possible, since the appearance of the entire product depends on this.
- Make the required number of elements from the papier-mâché mass: balls, triangles, ovals, and so on.
- Let them dry a little, but not completely. Using wire, we make loops and carefully insert them into the workpieces. Create the desired length and secure the lock.
In this way, not only beads are made with your own hands, but also bracelets, necklaces and even brooches. Look at the photo and choose the most attractive option for yourself. You can use your imagination.

Once you start making crafts from this material, you realize that it has enormous advantages, its composition is the simplest and most varied, and you can make anything from it! And today we will learn how to make papier mache with our own hands for beginners, and also look at all kinds of designs from it.
- Classic - layer by layer.
- Make a mass like dough. And use it to construct any shapes.
I admit, to get excited about modeling from this material, sometimes it’s enough to look at photos of finished products. And I confidently declare: ANYTHING CAN BE MADE FROM PAPIER-MACHE!
DIY papier-mâché technology and recipes for beginners
What papier mache can be made from:
- Newspapers;
- Toilet paper;
- Napkins;
- Egg trays;
- Sawdust;
- Flour;
- Vata et al.
I'll give you 3 options. Two of them are for the material itself. Each of them has its own advantages and disadvantages. The third recipe is paste for newspaper crafts. And then I will tell you how to use the third recipe to make a vase and other items.
Option 1 - papier mache without shrinkage from 7 components
You can make durable figures with small details and without roughness in this way.
This is one of the options; the recipe can be adjusted. Change some settings to make it more convenient for you personally.
An ideal mass for modeling, combining the properties of salt dough, clay and papier-mâché, suitable for both large products and for filling very small molds. When dried, it does not shrink, is absolutely smooth, that is, it does not require additional processing or sanding. Such a mass is prepared from ingredients that can be found in every home.
Ingredients:
- Toilet paper – 40g;
- Glue – 250g;
- Soap (liquid) – 1 tbsp. l.;
- Oil (vegetable) – 2 tbsp. l.;
- Starch – 40g;
- Flour – 100g;
- Lemon juice – 1 tsp.
Master class on making material:
- Stir in small portions. The main thing is to get a homogeneous consistency. It's better to take a small piece. Then you can easily control how much paper to take.
- When the dough is ready and there are no lumps, add soap. Everything is mixed well.
- Oil will add elasticity and help knead the dough well.
- It's time to add starch.
- Stir in flour.
- Once everything is combined into a homogeneous mass, knead for at least 4-5 minutes. First in a bowl. Just grease your hands with oil to prevent the dough from sticking. Then sprinkle the table with flour and knead on the surface.
If you do not plan to use it right away, add lemon juice, wrap it in a bag and refrigerate. Then just knead the lump, and you can work with it.
Advantage This recipe is that you can work with the material immediately after its manufacture.
Flaw - a more expensive option. And this is not a classic, but a combined method, which helps to achieve strength and smoothness due to the fact that there are practically no lumps in the “dough”, neither small nor large.
Option 2 - water + glue + toilet paper
I have almost everything on hand for this recipe. And it’s easy for kids to work with such unusual “plasticine”. They will be able to realize any of their ideas from this material.
But most of the work with this recipe involves not exact numbers, but your feelings.
Ingredients:
- Toilet paper;
- PVA glue;
- Boiling water.
Step-by-step instruction:
- Tear the rolled paper into small pieces.
- Pour boiling water over until completely covered.
- Leave for 2 hours.
- Mash until smooth with a fork or mixer.
- Squeeze out the water. Place some of the mixture into a clean, thin cloth. Roll up and squeeze out the water completely.
- Shred the paper again.
- Add glue. Knead.
Advantage method is that it is simple, cheap, and accessible.
Flaws – you need to give the mass time to brew and there will be roughness due to the inevitable heterogeneity of the paperweight.
For this method, you can also take newspapers. You just need to set aside a day for the initial soaking. And another 2 days to bring the mass to the desired condition.
Option 3 – no need to cook!

A classic of the genre is to create layers from newspapers. And this is my favorite option. To do this, you can use either purchased glue, such as PVA, or make it yourself.
Ingredients:
- Water – 0.5 l;
- Starch – 3 tsp.
Preparation:
- Combine starch and water and stir so that there are no lumps.
- Put on fire and boil. When the paste thickens, remove from heat. Stir constantly.
- Cool.
You can use flour instead of starch. Only then is it better to first dilute it in a glass of water to form a pancake dough. And then pour 1.5 liters of boiling water and bring to the desired consistency, stirring constantly. 
This way you can make masks for children, a globe - for more details, follow the link.
Little secrets
What additional (optional) ingredients are used? There are a lot of secrets and subtleties that will help make products more accurate and parts small and thin:
- PVA construction glue (not ordinary office glue).
- Add putty.
- A little plaster.
- Construction adhesive (for tiles, etc.).
- Liquid soap gives greater plasticity.
- Sunflower oil - and the mass does not stick to your hands.
- Starch and/or flour. Then the desired viscosity appears and then it will be easier to knead the “dough”.
- Lemon juice. If you want to prepare the mass in advance and store it.
Important!!! If you choose method 2, I advise you to find suitable toilet paper. Don't be sorry! Buy quality! It is thinner, 2-3 layers. Dissolves in water without lumps.
Questions about the material
Under what conditions should it be stored?
Up to 5 days - just in a plastic bag. More than 5 days, a week and a half - in the refrigerator.
What consistency should the glue be (purchased and your own)?
You need a medium consistency. If the glue is too thick, you can stir it with water. More liquid means more dry ingredients are added.
Paper, newspapers or napkins?
The choice of one of the main ingredients is decisive. Then the way you will construct the toys and the opportunity to work out the finer details are immediately determined.
Crafts: vase, house, plate for beginners
Papier mache plate
Any shape or plate will be suitable as a base. We use the 3rd option of papier mache - layers of newspapers. You can quickly and easily make a candy bowl or decorative plate
Vase
Video master class
We will need:
- Pieces of newspaper;
- Paste;
- Ball;
- Water;
- Paints;
- Tassels;
- Enamel.
Making: 
- Moisten the ball with water. Place the first layer of newspaper pieces on the wet base. You can also lightly moisten the pieces themselves.
- Coat the entire layer with paste and apply a second layer. Now the pieces are already soaked in glue.
- Do this for each subsequent layer. The thickness of the product depends on your preference. For example, 10 layers will ensure the strength and lightness of the vase.
- After every 2 layers, dry the product well.
- Allow to dry completely.
- Deflate the balloon and remove it.
- Align the neck. Draw a circle and make cuts up to this line. Then cut off all excess.
- Strengthen the neck. Glue pieces of newspaper onto the edge so that the other end of the piece is folded inward.
- Apply enamel or 2 layers of acrylic paint at once.
- Decorate using any decor you like.

Houses
I'll start with the video of the master class - wonderful!
Now photo master class
To make a house, we need:

How to do it. Simple instructions:

Do you want to make a two-story house?
After the figures are made, it is worth paying attention to alignment. To do this, you need to sand the craft. Then you can start painting. Otherwise, unevenness and bumps will be noticeable due to lumps in the mass or due to layers. Such irregularities can be disguised with decor.
New Year's toys and papier mache
And again, we take a balloon as a basis, inflate it to the desired size and cover it with beautiful paper or napkins in several layers.


Even if this is your first experience, even if you have no artistic talent, you can handle it! The main thing is to start!
Tell us and show us what you came up with! And stop by regularly. Become a subscriber and then you will learn many, many more interesting things!
A cheap and durable material from which you can create any three-dimensional compositions at home is papier-mâché. In French, papier means “paper” and mache means “ground, chewed, compressed.” The literal translation accurately conveys the technology used to create the material.
The sculpture is created in two ways: increasing volume or cutting off volume. To increase the volume, you need to successively add layers of paper soaked in glue. To cut off the volume, you first need to form a shape from a viscous and plastic mass, into which paper turns when mixed with water and glue.
What paper is suitable for making papier-mâché with your own hands?:
- Soft multi-ply or single-ply paper. Napkins, toilet paper, paper towels. The softer the cellulose fibers, the faster they absorb water and glue.
- Plain printer paper. It takes a long time to absorb water, but if there is no other option, this one will do.
- Notebook sheets, writing paper, notepads, watercolor paper. You can use any cellulose-based material, even cardboard. Thick and glossy sheets are poorly saturated with water, so you first need to compress the paper so that it becomes softer.
- Newspaper. This is an ideal option, since the newspaper sheet is quite durable, and at the same time soft. How many layers of newspaper you need to apply depends on the size of the product.
Before starting the process, you need to decide what technique the product will be created in.:
- Machining. The technique involves gluing a rigid frame shape. For the form you can use: foil, bottle, jar, wooden block, any product that serves as a support for the final composition.
- Modeling. Three-dimensional figures can be formed from papier-mâché in the same way as from clay or sculptural plasticine. An important point is drying; it will not be possible to dry such a product quickly. It is more profitable to first create a frame and dry it, and then add volume using additional layers of paper. For modeling, a viscous mixture of cellulose and glue is created, which becomes hard when hardened. After sculpting, hands should be washed immediately with warm water and soap, then the glue will be washed off.

Before realizing your idea, you need to make a sketch and decide how to make papier-mâché: by modeling or mashing. A sketch will help you avoid mistakes, determine the technique and work out the image in detail.
The sketch can be approximate, not detailed. It is important to indicate the proportions and approximate dimensions of the product.
Machining: master class
Masching is a meditative activity that takes place in stages and sequentially. Haste can ruin the product, so you should prepare yourself for measured work.
Master class on working with papier-mâché (video)
MK using this papier-mâché technique:
- Prepare paper cut into small pieces in advance. Some crafters claim that torn paper is better than cut paper, but it's really a matter of personal preference. To strengthen it, you can use a bandage; it also needs to be cut. It is convenient when the paper is of different colors. For example, if you take a newspaper, then layers with text will alternate with layers on which bright advertisements are printed. The difference in color will help you figure out where you need to add the next layer and where it already exists.
- Prepare a sufficient amount of PVA glue. The glue can be diluted with tap water, then it penetrates the paper faster. The maximum dilution ratio is 3 parts glue to 1 part water; the more water used, the looser the product becomes. Too much water will cause the sculpture to “float” and lose its shape. For detailed and thin products, undiluted glue is better. In addition to PVA, you can use glue for paper wallpaper or homemade paste. The instructions for the glue contain information about its toxicity; you need to choose an environmentally friendly glue without a strong odor, because it will take a long time to glue.
- For the paste you need starch and boiling water. Pour starch into a cup, add boiling water and stir until smooth. The thickness of the paste should resemble sour cream. After finishing the work, the paste must be immediately washed off from the cup, after hardening, this will be problematic.
- If the frame mold then needs to be removed from the finished product, you need to lubricate its surface with vegetable oil, Vaseline or any greasy substance to prevent the mass of paper from sticking to the frame.
- If you do not plan to remove the mold, it can be covered with PVA or paste. After the preparation of consumables is completed, you can begin creating the sculpture.
The technique for performing the work is very simple, it is easy to do it yourself if you have patience. The paper is applied layer by layer, the glue is distributed with a large brush. You need to dry the layers either until dry or semi-dry.
How to quickly dry papier-mâché: options
After completing the volume expansion, the product should be left for 2 days. It will not dry quickly at room temperature.

How can I speed up the process?:
- Place the product in the oven at 50-100 degrees;
- Use a heater, battery or heat gun.
Some craftsmen claim that the product may crack when heated. This is not true. To test from personal experience how a sculpture reacts to temperature, you can make a very small piece and place it in the oven. If the glue composition tolerates heat well, then dry it in the oven. If any defects arise, dry most of the work at room temperature.
How to make papier-mâché smooth after drying:
- Smooth out unevenness using sandpaper or sandpaper;
- Sand the surface with fine sandpaper;
- Cover with acrylic artistic or construction primer;
- Apply paint, varnish, mosaic or decoration.

If you make a large and simple figure from papier-mâché with your own hands, for example, a stump for a summer house, coarse sandpaper is used to speed up the process.
If the figure is small and detailed, for example flowers or fruits, you should immediately use fine sandpaper.
How to remove papier-mâché from a mold
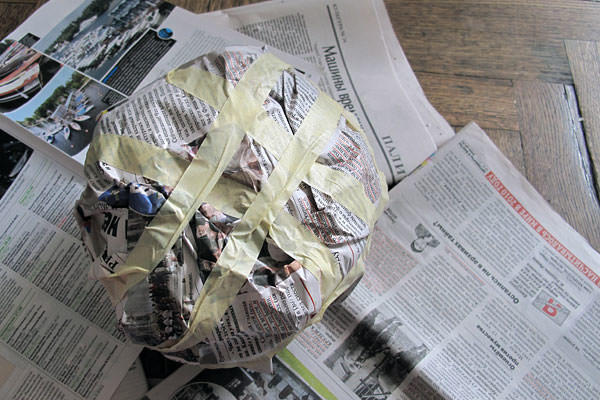
If the sculpture needs to be separated from the frame form, you need to lubricate the form with Vaseline or any greasy cream before gluing. Conventional cling film is also used to process the mold. It is wrapped tightly around the frame so that there is no air gap left. Then the papier-mâché is removed along with the film.

The adhesive tape resists glue well; the smooth texture of the adhesive tape will protect the form from adhesion to papier-mâché. Taping is done in pieces, without gaps.
Papier-mâché: how to make it using the modeling method
The machining technique makes it possible to create thin and durable things. If the work is more complete, without small details, it is more profitable to use modeling.
To prepare the mixture for modeling, you will need:
- Basin, cup, bucket, any container of suitable size that you have at home;
- Mixer or drill with an attachment for mixing paint;
- Sieve or mosquito net.

To make the mixture durable, wallpaper glue or PVA glue is added to it. To make the mixture plastic, you need to prepare a paste.
For paste:
- Pour boiling water over the flour, 1 part flour to 3 parts water;
- Bring to a boil, stirring;
- Break up the lumps, give a uniform consistency;
- Cool and add to mixture.
You can use starch paste.
Making a sculpture from a modeling mixture:
- Pour small pieces of paper into a basin;
- Add warm water and paste;
- Add glue and beat until smooth using a mixer or drill with a paint stirring attachment;
- Let it brew for 2-3 hours;
- Stir again;
- Let it brew for 2-3 hours;
- Squeeze out the water, if there is excess, pass the remaining mass through a sieve or mosquito net to separate large pieces;
- Sculpt.

The mass must be flexible enough to hold its shape. You can dry it at room temperature, and if it doesn’t crack, then in the oven at 50-100 degrees.
Working with papier-mâché at home
High-quality drying and compliance with proportions are a necessary condition for obtaining beautiful and neat work. During drying, the product should not be moved, touched or poked with sharp objects to check readiness. Wet papier-mâché should not be dropped or squeezed. Drying should be done in rooms where children and pets do not run around, which could accidentally damage the product.

In order to be able to transfer the sculpture from the desktop to where it will dry, you need to immediately create it on glass, a tray or a board.
If, by an unfortunate accident, some part of the papier-mâché has separated or the product has broken, you should dry everything until ready, then glue and sand the defects at the joint. You can increase the volume and restore a sculpture that has been injured.
What can be made from papier-mâché
The material has a wide range of applications and is used to create any round or flat sculpture, high relief or bas-relief, and stucco decorations.

Application of papier-mâché:
- Wall decor with stucco;
- Costumes for children's parties, helmets, swords;
- Masks for walls;
- Round vases, three-dimensional flowers, figures of people and animals;
- Interior decorations, decorative plates, bottles.
Flowerpots made of papier-mâché (video)
After the product has dried, it is sanded, primed, and then coated with acrylic. Acrylic is the best paint for papier-mâché, which creates a protective film.
You can finish the job by applying glossy or matte acrylic varnish, with a brush or spray can.
Papier-mâché technique (photo)


.3_%D0%BC%D0%B0%D1%88%D0%B8%D1%80_.jpg)


