Square duct for hoods. Mounting the duct for a kitchen hood
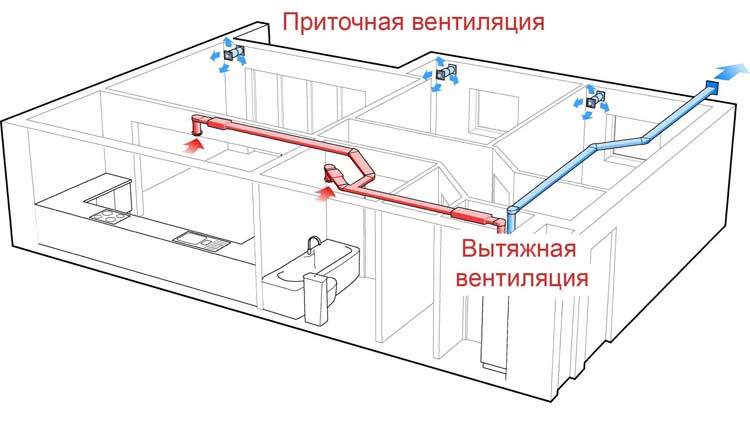
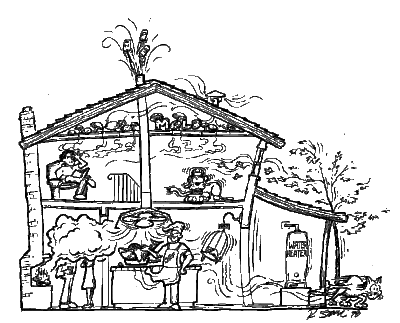
For normal life in the apartment you need clean air. It should be provided by natural ventilation, which is always planned in residential buildings. But with intensive cooking in the kitchen, it is not enough, so in most modern apartments kitchen hoods are installed to help cope with the abundance of steam, fat and odors. If the owner decides to choose a circulation device, installation of an additional vent pipeconnected to the hood for the kitchen. Find out how to do it yourself.
What is needed for proper maintenance of natural ventilation in the apartment?
You need to know that in city apartments only exhaust ventilation, and the inflow is provided by passive ventilators - windows.
Note! The ventilation system is effective when the supply and exhaust air volumes are equal. Therefore while working powerful cooker hood will have to open a window.
Supply system
The flow of fresh air can be controlled using the simplest air supply devices: windows and windows. After replacing wooden windows with sealed plastic windows for these purposes may be required. When replacing windows, it will be rational to install plastic doors in the kitchen and close them when cooking. Natural ventilation will quickly cope with air purification in a small room.
Natural range hood
The cause of a weak outflow of air may be a clogged ventilation duct. The owner of the apartment may adjacent to the premises, and grill. The main shaft with bends must be cleaned by workers of the housing organization.
It is possible to increase the efficiency of natural extraction by installing a fan at the entrance to the ventilation duct or inside it, which significantly increases the power flow. Similar methods turn natural ventilation into forced ventilation. It can not be used always, but only when cooking.
Cooker hood
With the local allocation of contaminants from cooking products, installation of an additional exhaust device is still required. It is of two types:
- purifying the air and returning it to the room;
- circulating (flowing), providing the conclusion of polluted air through the ventilation channel from the apartment.
In the first case, a flat device is installed above the stove and air is filtered through it. The ventilation duct in this case is not needed.
The outlet must not be installed too close to the stove, so you may have to replace the hood, since most appliances have a very short cord.
The main difference between installing a circulation hood, which is also hung on the wall or built into kitchen furniture, is the need for a device. The vent is close to the stove. The best option is to place it directly above it. The outlet of the appliance should be located as close to the airway as possible.
Important! The duct should be as short as possible so as not to create additional noise and resistance to air movement.
Duct selection
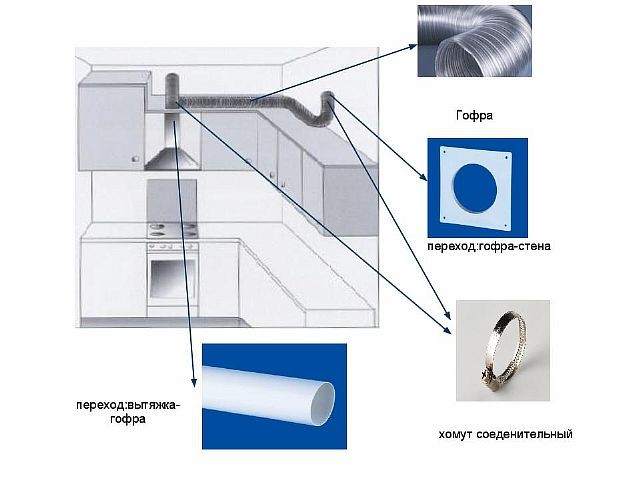
The exhaust air is removed through a pipe, which may differ in the following ways:
- by material;
- diameter or dimensions of the sides of the box;
- sectional shape;
- flexibility.
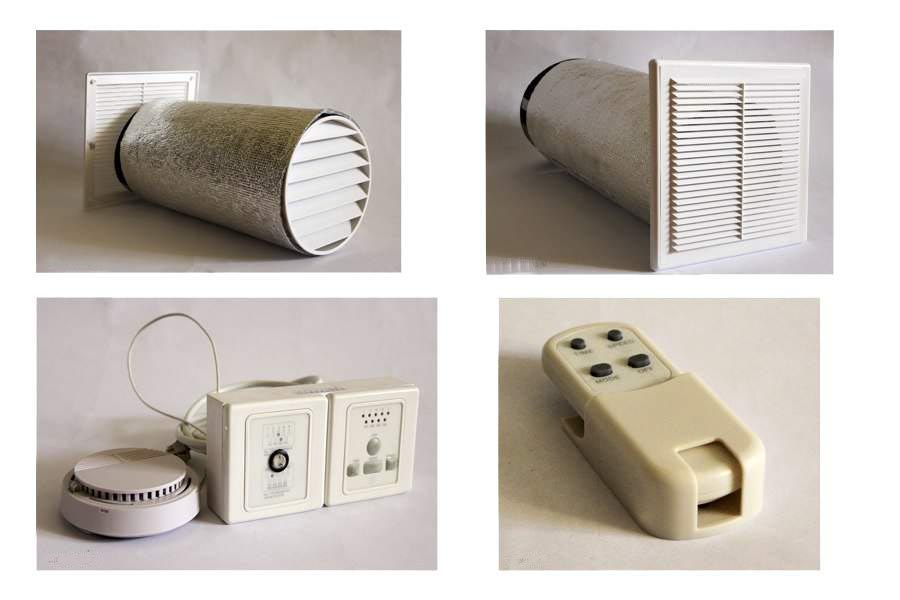
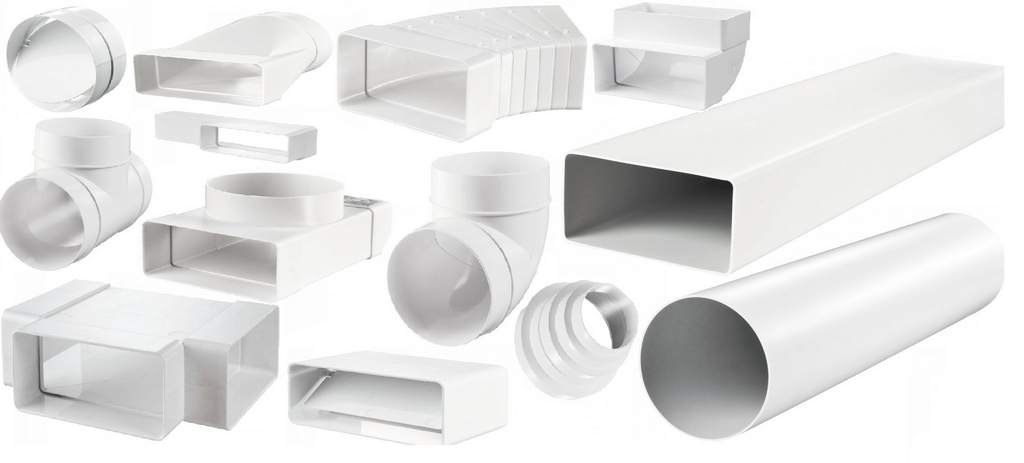
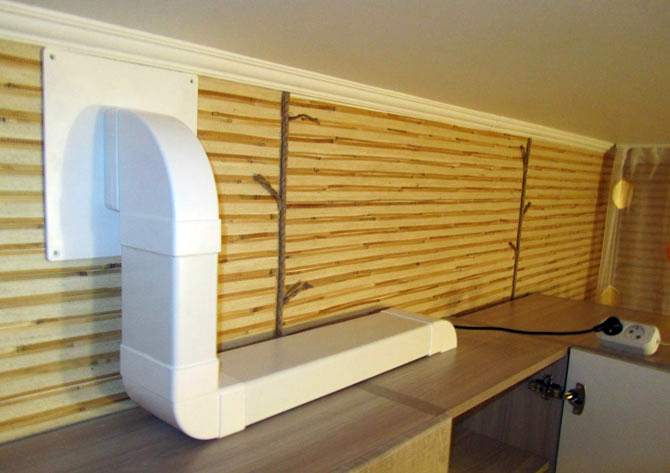
Plastic duct
Most of the exhaust pipes are made of plastic, which in any of its varieties (PVC, polyurethane, polypropylene) has its advantages:
- Noise reduction.
- Low airflow resistance.
- Easy installation and handling.
- On a smooth surface, dirt does not accumulate.
Ducts are made round and rectangular. The former have less resistance to air, while the latter are better suited to the interior of the kitchen. For each species there are adapters.
It is especially important to choose the right diameter or dimensions of the sides of the box and connect the duct at the inlet and outlet. A snug fit is ensured by the use of sealant.
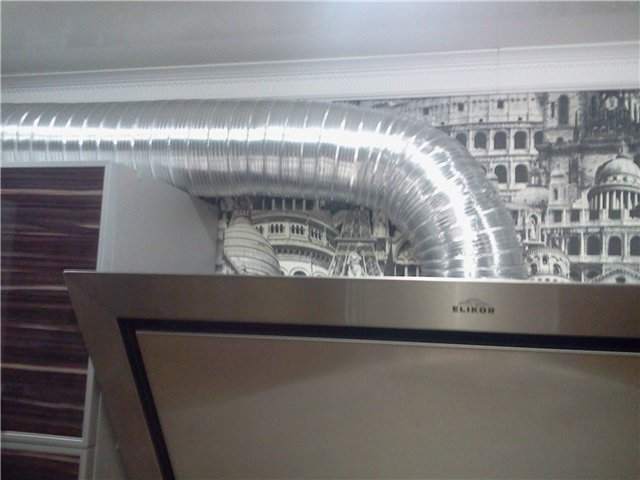
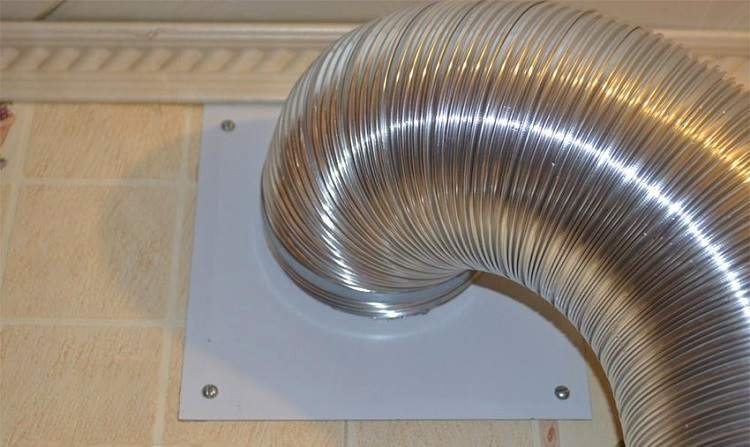
Aluminum corrugation
The pipe in the form of an aluminum corrugation has a small length. During installation, it stretches, which makes the walls smooth and reduces noise. The flexibility of the pipe allows it to be placed in hard-to-reach places, but each bend reduces productivity. The standard pipe diameter can be 10, 12, 12.5, 15 cm.
Due to the unattractive appearance of the corrugation and try to hide in closets or behind suspended ceilings. They are also masked behind the lower level of the drywall or rectangular plastic boxes with a color corresponding to the interior of the kitchen. It is possible to install spotlights on them, which will provide zone illumination of the stove.
Design
When considering the design of the ventilation duct for a cooker hood, it is important to consider several fundamental points:
- The diameter of the duct is selected so that it is equal to the ventilation hole and is larger than that of the kitchen hood.
- The number of bends and the length of the pipe should be as small as possible.
- Each meter reduces draft by 5–10%, so the maximum length is 3 m, which is quite enough for a normal kitchen.
- For ventilation and exhaust hoods, a check valve is installed, which ensures their joint operation and prevents the appearance of reverse thrust.
Duct installation
Consider the installation sequence of the ventilation duct for exhaustion do it yourself. What should be done:
- according to the attached instructions. The device is easily mounted do-it-yourself kitchen Cabinetunder the cupboard or on the wall.
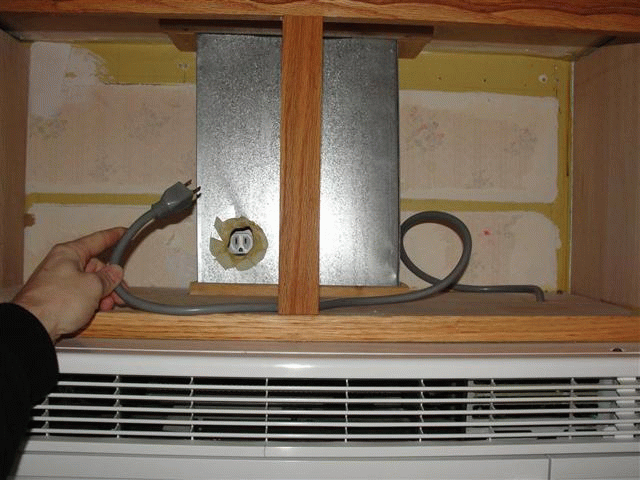
- Lay concealed wiring and plug in a power outlet. It is important to choose a distance to the plate, which should not be less than 60 cm.
- Prepare duct. It will require a nozzle, selected by the size of the duct and ventilation hole. It is impossible to narrow the aluminum pipe and bend at an acute angle, since it can be damaged. Adapters are used to rotate the plastic duct. To make the installation of the hood with your own hands, it is advisable to buy the whole kit, then you do not have to pick up an air duct of a suitable diameter to it.
- Connect the duct to the exhaust pipe with a hose clamp. It is not necessary to seal the joint as it is disassembled for cleaning.
- Lay the pipe to the ventilation window. It is attached to the wall with clamps and dowels. The ventilation duct is assembled using silicone sealant. Pipes connected by adapters should have the same cross section.
Today we will master the experience of the fraternal states in installing a duct for a kitchen hood, discuss the burning problems of ventilation caused by the incorrect action of builders, and outline the importance of killing two birds with one stone. Perhaps the information received is useful to the reader, building their own housing, performing shabbok. Installation of the duct for the kitchen hood must be carried out in accordance with the recommendations of SNiP, other regulatory acts. Reduce the number of corners, channel turns that reduce the efficiency (efficiency) of the ventilation channel.
Avoid installing ducts incorrectly.
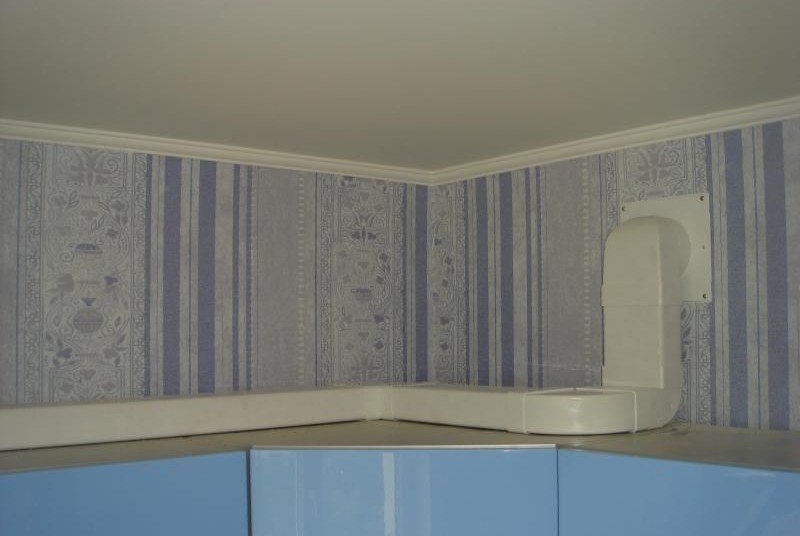
The Ukrainian channel Inter showed the installation of an exhaust hood using round, rectangular ducts. The perimeter of the kitchen was a series of hanging cabinets. Under the section, it was decided to strengthen the flat hood. In the furniture located vertically above the stove, two holes were made with a mill, with a diameter containing a 125 mm round duct. Holes pierced the floor, the ceiling of the cabinet. Installation was carried out by a plastic air duct.
The hood was strengthened right next to the section, under the bottom. A segment of the round duct passed through the cabinet, stretched out from above, connected with a special adapter segment: the bottom side contains an inlet with a diameter of 125 mm, and a rectangular outlet on the side. From the segment to the ventilation hole went a flat duct for drawing through cabinets. Throughout the plastic path, the channel is invisible from the outside, the appearance of the kitchen remains the same. A rectangular duct was connected to the ventilation hole by another segment, similar to the one mentioned above. The connecting element was a round section equipped with two turns, tightly capturing the opening of the ventilation network.
Varieties of plastic ducts
Beautiful, contains three gross errors from a practical point of view:
- Looking for a way to free itself, the air will overcome four bends of 90 degrees. Each turn reduces the efficiency of the hood by 10%. There are four bends:
- directly above the hood at the butt segment;
- two turns in the corner on the second butt segment;
- bend inside the ventilation system.
Forty percent of efficiency is lost.
- A rectangular duct is smaller in cross-section than a round one, and hood performance will be greatly reduced.
- The main disadvantage: the ventilation system is destroyed.
Let's consider three points in more detail. As for the number of turns, paying tribute to the appearance, our installers lost 20% of the power only due to unnecessary bends. Obviously, the best solution was to use a round aluminum corrugation with one bend above the hood. Visible above the cabinet, easy to fix with a decorative panel made of drywall or other material.
A flexible exhaust duct would be suitable to avoid losses during the transition to a smaller rectangular section. How to proceed. Find a segment with access to a square duct of a similar section or carry out work round. It’s harder to hide the channel, but the maximum efficiency.
The main thing is the third point.
Why ventilation and exhaust are two different things
According to sanitary standards, the living room is equipped with ventilation. The entrance is located in the non-residential part, where most of the factors unfavorable to the person are formed. People use kitchen equipment, wash, wash, smoke, use the toilet. The processes form an abundance of moisture, odor, ventilation is designed to remove unnecessary. When the subsystem of the living room is faulty, the laundry dries in the bathroom for 2-3 days, the ceiling and walls are overgrown with condensate. Over time, the problem causes the growth of the fungus, mold - a separate conversation. Smoke, the smoke will spread throughout the rooms. This is what malfunctioning ventilation leads to.
Most people know the problem of the upper floors. There are three ways to bring the ventilation duct out:
- The canal penetrates the floors, exits, bypassing the attic, onto the roof in the form of a pipe covered from above.
- In the attic, the channels are connected by boxes, go out together.
- Air is discharged into the attic, from where it enters the street.
There are no problems with the first method. For a sure exit of air from the apartment to the street, 2 meters should go through the pipe, the height of the attic is so much. However, a reliable method is unsuitable for high rise buildingsUnfortunately, new developments sin the problem of the upper floors.
When air leaves a vertical shaft, it hits the roof of an attic or duct. A traffic jam is created. The air continues to push and seeks outs. One is a pipe going out, the other is a ventilation hole in the kitchen of the residents of the last floor. The above two meters is not recruited for the thickness of the floor. All year round, people pull backward thrust. We will breathe by the fact that the air collected from the remaining floors.
There is no simple way to solve the problem:
- Firstly, you can increase the height of the duct, which is beaten by the air flow. And two to three times. But this is done by the construction team in coordination with state authorities.
- Secondly, you can separate the ventilation duct of the upper floor from the rest. Fraught with construction work, will require thermal and hydro insulation of the new stroke.
See how many nuances there are in the working ventilation network. Refining the duct with kitchen hoods will also add complexity. Remember the video discussed. If it happened on the top floor, the stove will collect odors from the lower floors, ventilation will be impaired.
If the upper floor has a separate exit, it should be increased in height so that the length becomes 2 meters.
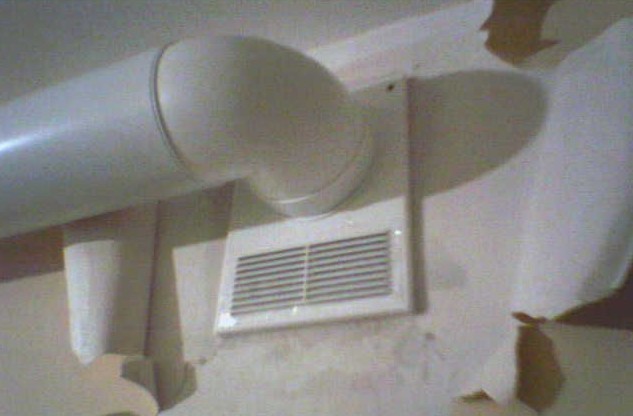
Properly insert the duct into the ventilation
From the above it becomes clear why the duct enters the ventilation system, bypassing a special grille with a check valve. In the product near the inlet of the hood there is a company of holes designed for the outflow of air from the apartment. Two branches are combined into one through such a lattice. When the hood is working, the ventilation holes are blocked, the flow goes only through the air ducts. If the engine is off, air enters both ways. Sometimes we notice how the fan propeller turns off the hood.
The importance of properly supplying the apartment with fresh air is clear from the above. Installation of the exhaust duct is only paired with a grill equipped with a check valve.
Choose duct size
Two factors reduce hood performance:
- The presence of turns of 90 degrees (sharp corners are not allowed at all).
- Reducing the cross-sectional area of \u200b\u200bthe ventilation path.
How does the above relate to the everydayness in which we live. The ventilation passages of most buildings traditionally have a diameter of 14 cm. Square shafts are built with a side of 13 cm. It is not difficult to guess that by connecting a duct with a smaller cross section, we use the passage partially. Refinement will become a channel bottleneck. And vice versa, an overly large duct will not bring much benefit, since the path narrows further. Correct will be to evaluate the dimensions before choosing a hood. To buy an umbrella, air ducts should be on the understanding of how well the products will work together.
Additional Rules
Installation of the exhaust duct is carried out according to the instructions. The easiest way is to install aluminum corrugation. Such products are sold in small pieces, each stretching to three meters. The duct will bend in an inconceivable way, given that there should not be sharp turns in the highway.
From both ends of the corrugation there are clamps, mounted on the corresponding hood elements, grilles using standard manual power tools.
It’s easier to work with plastic ducts. Sawed by hand with a hacksaw, assembled without effort, however, you can use adhesive sealant, reliably insulating the joints. An additional advantage - in the store there are special transitional elements, thanks to which mixed installation of round and rectangular products is possible.
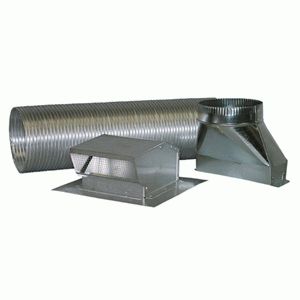
Harder to process metal. Some umbrellas come complete with pieces of air ducts, you do not have to choose. The design is customized locally. Ducts are lapped, joints can be treated with glue.
According to the technology, holes are pierced in the walls, fasteners are inserted, in practice, craftsmen simply thread products into each other, grab them with sealant. Naturally, the process affects the structural strength, enough for the kitchen. Sections are fixed to the wall, furniture, to the clamp with screws and dowels, nails.
It remains to mention that vertical segments are often closed up in sections of hanging cabinets, this hides the trunk from the eyes. The horizontal section lies on the wall-mounted furniture. The tactical move minimizes the visual negative effect of mounting the hood. Before installing the exhaust duct, evaluate the possibility of such a solution.
Whatever duct was chosen for the kitchen, proper installation plays an important role. The duct assembled according to the instructions will protect the apartment from sharp, unpleasant odors.
Air duct for the hood - an assistant in the kitchen for a modern housewife. Thanks to him, when cooking, cinder and fat do not settle on kitchen wallpaper, but is pulled out of the room. Moreover, an exhaust hood with an air duct prevents caustic odors from leaving the kitchen.
Forced hood has many advantages. The most important of them is high-quality air purification. The price of this unit is also pleasing, because the hood without a duct is more expensive. In addition, products with air ducts have different colors and shapes, which means they are suitable for any style of the kitchen.
What type of cooker hood duct is better? Consider the types of products and try to identify the most effective and durable.
Kinds and advantages
The duct for the kitchen can be corrugated or smooth plastic. Corrugated products are semi-rigid aluminum or plastic structures. Smooth plastic ducts apply much more often.
The shape of the product can be:
- rectangular;
- round.
Corrugated models have a number of advantages, including:
- reasonable price in comparison with plastic analogs;
- smooth bends and the absence of additional connecting elements;
- the ability to stretch the corrugation to the required distance;
- the ability to increase the diameter of the corrugation in relation to the diameter of the hood.
Plastic ducts designed for cooker hoods also have their positive sides. In particular:
- sound insulation is better than metal models;
- more efficient air extraction due to low resistance;
- smaller than metal counterparts, clogged with grease and dirt, all this falls into a special container.
Regardless of which model the customer has stopped at, in any case, the duct needs proper installation. We will describe in detail all the stages of installing the pipe for the hood.

Preparation for installation
Before installation, all dimensions must be checked. The diameter of the duct should be exactly like the diameter of the hole in the hood. If the diameter of the duct is smaller, then because of the resistance, the retraction force will be weak.
In addition, during installation, you need to pay attention to the bend angles of the duct. So that the resistance is not high, each bend angle of the duct should not be more than 90 degrees.
To avoid back draft from the ventilation shaft to the kitchen utensils, a check valve must be installed. We proceed directly to the installation vent pipe.
Installation
Restoring the air duct in the kitchen should begin with the selection of tools. To install the pipe, you may need:
- hacksaw and scissors for metal;
- jigsaw;
- ruler and pencil;
- grinder and electric drill;
- guns: for polyurethane foam and for silicone sealant;
- flat nippers and files;
- sandpaper;
- hammer;
- screwdriver;
- construction knife;
- vise.
When all the tools are assembled, you can begin to work. Let's start by making holes for the clapperboard.
Make holes
The cracker is best selected from materials such as tin, aluminum or galvanized. It is most convenient to mount the cracker on a shelf located above the hob. A clapperboard is attached to the shelf with mounting glue, and attached to the ventilation hole with mounting foam.
The installation of a cracker should be done only after trying and marking on the upper board of the hole shelf, its diameter must necessarily correspond to the diameter of the lower hole of the cracker.
We work with furniture
The shelf must be released and removed from the hinges. At the bottom of the jigsaw cut a hole. After that, insert the duct into the hole. Next, proceed to laying the corrugation.
Laying the ventilation pipe
Furniture is laid on the back panel. The corrugation of the required size is pushed into the done recess. Next, insert the corrugation into the upper panel, and cut the corners of the upper recess with scissors by 15-20 mm and twist in different directions. After that, we proceed to fasten the crackers.
Clapper Fasteners
We attach the shelf with the corrugation into place. We cover the parts of the bent foil with silicone and do the same with wooden corners. Raising the box up, insert it into the ventilation hole. Then we lower it to the panel of the shelf, in accordance with the marked points.
Removing silicone residues with a sponge dipped in table vinegar. About an hour after the silicone has dried, a gap of gaps between the edges is blown out with a jet of foam. Then we proceed to the final stage - directly installing the hood.
Hood installation
In the window made in the bottom panel of the shelf, insert the hood. Next, we attach the hood to the furniture with screws through the mounting recesses. Then we lap the corrugation hoods onto the exhaust pipe and fasten it with a clamp. Soft wire is best for this. It is not necessary to seal, because for cleaning the hood, it will be more difficult to disassemble.
Be sure to consider the electrical wiring for the hood. Connect the hood only through a grounded outlet. For this, the Eurostandard model is better.
Whatever duct was chosen for the kitchen - corrugated or plastic, proper installation plays an important role. An air duct assembled according to the instructions will be an excellent assistant and will protect the apartment from the penetration of sharp and unpleasant odors.